Dog Ear Care
Oct 17, 2018 Tracey Aston Grooming

Understandably, ear care is among the top fears for pet
parents. It's true, a dog's ears are complex and this causes pet parents worry
about possibly damaging their pets hearing. A dog's ears need to be checked
often and monitored for life and a little basic maintenance now can stave off
problems later. For this reason, its imperative pet parents feel comfortable
checking their dogs' ears and obtaining the knowledge of how to provide ear
care safely for their pets. Consider adding ear care to your routine grooming
schedule to make it a habit. The ear won't always need to be cleaned, but you
can use this time to check for redness, stray hairs that might have fallen into
the canal, excess ear wax or a foul odor.
The absolute most important piece of knowledge is to NEVER
insert anything into your dog's ear canal! No! Not even a Q-tip! Doing so could shove
debris into the ear, damage the inner ear and ear drum and result in a
perforated ear drum and/or hearing loss. To externally clean a dog's ears -
around the opening and the flap of the ear – dampen a cotton ball with baby
oil, rubbing alcohol, mineral oil or a solution made specifically for ear
cleaning. A holistic alternative is a 50/50 solution of water and apple cider
vinegar. While ear care is important, over cleaning can lead to irritation and
actually make the situation worse. Ear
skin is very delicate, so always take extra care and use an extremely gentle
hand when handling a dog's ear.
The inner ear of a dog is deep and twisty with lots of
folds, making them an easy target for bacteria, yeast and parasites. Dogs
suffering from seasonal or food allergies and dogs with floppy, low hanging
ears, such as beagles, basset hounds and cocker spaniels, are particularly vulnerable
to this. If your pet does have low hanging ears, air flow is key to healthy
ears! Trimming the hair around the opening on the ear canal can allow for
better air flow. Also, if your dog has long hairs by the ear canal, check to
make sure hairs aren't falling into the ear canal and causing a blockage.
Take great care trimming around the opening on the ear. Make
sure your pet is comfortable enough they won't be jumping around while you're
trimming. If using trimmers or scissors
near your dog's ear makes you nervous, try an ear powder made to remove hair
around the ear. To use ear pro powder, squeeze
a generous amount on the hair – not in the ear- and remove the hair by making
small circular motions on the hair. This
method is completely pain free and doesn't carry the risk of sharp instruments.
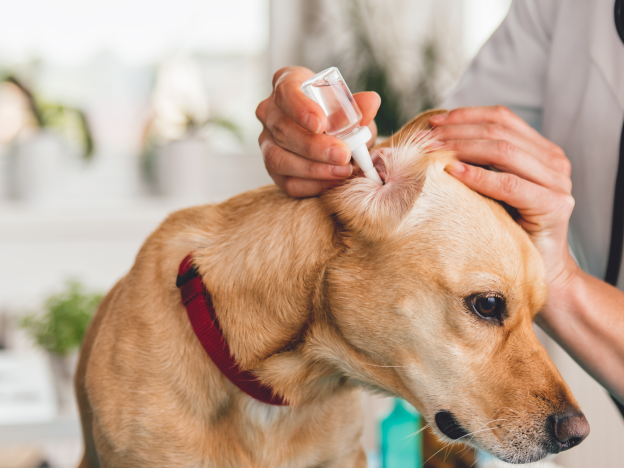
To clean the inner ear you'll need a good quality cleaning solutions made specially for cleaning dogs' ears. Never insert the bottle into the ear, this could cause damage as well as spread bacteria or yeast if it's present in the ear canal. Gently hold open the ear flap with one hand and squeeze some cleaning solution into the ear with the other hand. Continue holding the ear flap up and massage the base of the ear for about 30 seconds, this will allow the cleaning solution to break up any wax or possible debris in the ear canal. Now be prepared, this next step can be messy! Next, allow the dog to shake their head to remove any ear cleaning solution, wax, hairs and debris and move them to the outer opening. After your dog is finished shaking their head, and they might shake more than once, remove any wax, hairs or debris from the outer ear canal with a cotton ball.

Consult your veterinarian if you notice any blood, open
wounds, ear discharge, crusty skin, redness or dark ear wax with what looks
like coffee ground or foul odor. Constant shaking, scratching, sensitivity to
touch can be signs of ear infection, mites or allergies.
Always be extremely gentle and patient with your dog,
providing reassurance and treats between ear cleanings and your dog will soon accept
routine ear care as part of the normal grooming process.


